

Opener & Remote Guide
How to Program a Garage Door Opener & Remote (LiftMaster, Chamberlain, Genie)
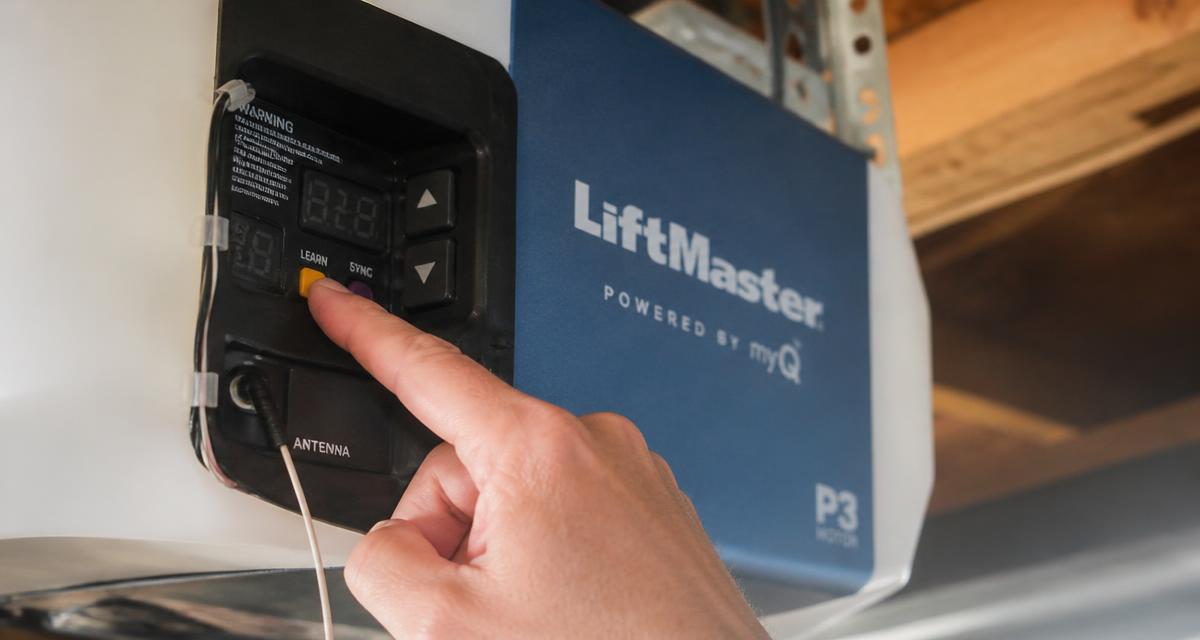
Programming a garage door remote takes about 30 seconds once you know where the Learn button is. The exact steps depend on the brand (LiftMaster, Chamberlain, or Genie), the year the opener was made, and whether it uses modern rolling-code security or an older DIP-switch system. This guide walks through both — plus keypads, HomeLink car pairing, universal remotes for older units, and the fixes for the most common "it won't program" problems.
First: identify your opener
Pull the light cover off the motor unit and look for a manufacturer sticker and a colored square button labeled Learn, Smart, or Program. The button color tells you almost everything you need to know:
| Brand | Learn button color | Years | System |
|---|---|---|---|
| LiftMaster / Chamberlain | Purple | 2011–present | Security+ 2.0 (rolling code) |
| LiftMaster / Chamberlain | Yellow | 2014–present | Security+ 2.0 with MyQ Wi-Fi |
| LiftMaster / Chamberlain | Orange / Red | 1997–2011 | Security+ (rolling code, 390 MHz) |
| LiftMaster / Chamberlain | Green | 1993–1997 | Billion Code (fixed, 390 MHz) |
| Chamberlain (older) | DIP switches | Pre-1993 | Fixed code, 300–390 MHz |
| Genie | Round blue LED near "Program" | 1997–present | Intellicode (rolling code, 315/390 MHz) |
| Genie (older) | DIP switches | Pre-1997 | Fixed code |
Replacement remotes must match both the brand's system and the frequency. A Security+ 2.0 remote will not pair with a Security+ opener, even though both are LiftMaster.
Program a remote to a modern opener (2011+ smart units)
Works for any LiftMaster or Chamberlain with a purple or yellow Learn button, and any Genie Intellicode from 1997 onward. Same idea — the wording just changes slightly:
- Open the motor cover. The Learn button sits next to the antenna wire on the back or side. Have a stepladder ready — the button is small.
- Press and release the Learn button. An indicator LED turns on solid for about 30 seconds. Don't hold it — a long press erases codes instead.
- Press the remote button. Within 30 seconds, press and hold the remote button you want to use for 2–3 seconds. The opener light flashes or the motor clicks once to confirm.
- Test it. Close the door, then press the newly paired button. It should open on the first try. If not, repeat from step 2 — you probably missed the window.
Program a keypad (any brand, 1997+)
- Press and release the Learn button on the motor unit.
- Within 30 seconds, enter a 4-digit PIN of your choice on the keypad.
- Press ENTER (LiftMaster/Chamberlain) or # (Genie). The opener lights flash to confirm.
- Test: enter your PIN, press ENTER/#, and the door should activate.
On Security+ 2.0 LiftMaster/Chamberlain keypads, PINs are 4 digits by default but can be extended to 8 for higher security. Genie keypads support a temporary PIN with an expiration count — useful for contractors, dog walkers, and short-term rentals.
Program your car (HomeLink and Car2U)
HomeLink is built into most cars sold since 2000 — usually three buttons on the visor, rearview mirror, or overhead console. Car2U (Nissan, Chrysler, some Lexus) works nearly the same way.
- Clear the module (first time only). In the car, press and hold the two outer HomeLink buttons until the indicator LED flashes rapidly (~20 seconds), then release. This wipes any previous codes.
- Train the button. Hold your working garage remote 1–3 inches from the HomeLink button you want to use. Press and hold both buttons until the HomeLink LED switches from slow flash to rapid flash. Release.
- Security+ 2.0 extra step (purple/yellow Learn button).Modern rolling-code openers need an extra handshake. After step 2, go to the motor unit, press and release the Learn button, then within 30 seconds press the HomeLink button in the car three times — press, release, press, release, press, release. The opener lights flash to confirm.
- Test from the driver's seat.
Some 2019+ vehicles ship with HomeLink Connect, which is programmed through a smartphone app instead of the visor — check the owner's manual before assuming the physical process above applies.
Older openers (pre-1997) with DIP switches
If your opener is old enough that the Learn button is missing and the wall control still uses a multi-conductor bell wire, pop off the motor cover and look for a bank of 8–12 tiny white or blue switches — that's a fixed-code system.
- Write down the exact up/down pattern of the DIP switches inside the motor unit.
- Buy a compatible universal remote — the LiftMaster 375UT, Chamberlain KLIK5U, or Genie GITR-3 all cover 300–390 MHz fixed and rolling code. Slide open the battery cover to find a matching bank of DIP switches.
- Set the switches on the remote to the exact same pattern as the motor unit.
- Reinstall the battery and press the remote. It should work immediately — no Learn button needed.
Fixed-code openers have no security beyond the DIP pattern, which means anyone with a code grabber near your driveway can capture and replay it. If your opener is DIP-switch-based, it's worth replacing the motor for a modern rolling-code unit — parts are also increasingly hard to find, and most sensors from that era are no longer compliant with UL 325 safety standards.
Erase all remotes (moving or selling your home)
Any time you buy or sell a house, wipe every paired remote from the opener — you have no idea how many contractors, neighbors, or previous owners still carry a working clicker.
- Press and hold the Learn button on the motor unit for about 6 seconds until the LED goes out (Security+ 2.0) or the light blinks (Genie).
- Every remote, keypad, and HomeLink code paired to that opener is now erased.
- Reprogram any remotes, keypads, or cars you want to keep using — takes 30 seconds each.
Troubleshooting: "my remote won't program"
- Wrong frequency or security type. A Security+ 2.0 remote (purple Learn button) cannot pair with a Security+ opener (orange/red Learn button). Verify the remote's compatibility on the manufacturer's cross-reference chart before buying.
- Dead battery. A remote with weak battery will pair intermittently or not at all. Swap for a fresh CR2032 (most modern remotes) or 9V (older visor clickers) and retry.
- Missed the 30-second window. After pressing Learn, you have ~30 seconds. Climbing down the ladder and walking to the door easily eats that. Bring the remote up the ladder with you.
- Locked out MyQ opener. A yellow-Learn LiftMaster tied to a MyQ account may require you to add the remote through the myQ app rather than the Learn button.
- Motor's Learn button is broken. The tactile switch on 10+ year-old logic boards fails. If pressing Learn does nothing (no LED response), the board or the button needs replacement — call a technician.
- Antenna wire cut or missing. If the remote works only when you're standing next to the motor, the little copper antenna wire has been broken off. It should hang straight down about 6 inches. Solder or replace before the remote will work from the driveway.
Frequently asked questions
How long does it take to program a garage door remote?
About 30 seconds once you've located the Learn button. Most homeowners spend longer getting the ladder out than actually pairing the remote.
Do I need to buy a brand-matched remote?
No. Universal remotes (LiftMaster 375UT, Genie GITR-3, Chamberlain KLIK5U) pair with virtually any brand and frequency going back to the early '90s. Brand-matched remotes are slightly easier to program on modern smart units but cost 2–3× more.
Can I program the same remote to two different openers?
Yes. Most remotes have 2–4 buttons, and each can be paired to a different opener — repeat the Learn-button process for each button on each unit.
Why does my remote work sometimes but not others?
Almost always weak battery, a broken antenna wire, or radio interference from a new LED bulb inside the motor unit. LED bulbs are notorious for jamming garage-remote frequencies — swap for an incandescent or a LiftMaster-certified LED and range usually doubles.
Should I replace my opener instead of buying new remotes?
If the opener is pre-1997 (DIP-switch or green Learn button), yes — modern Security+ 2.0 units with Wi-Fi, battery backup, and safety-compliant sensors run $500–$900 installed and dramatically improve security and reliability.
Related reading
- Garage door opener installation cost
- Opener repair guide (Charlotte)
- Garage door openers we install
- Opener repair services
- Full pricing guide
Stuck programming your opener?
If the Learn button doesn't respond, the LED is dead, or the remote pairs but the door won't move, the logic board or receiver may be the problem. Same-day diagnosis across Charlotte and the Carolinas — flat-rate written pricing before any work starts.
Ready to fix it?
Programming failing every time usually points to a worn receiver board.
- Opener repairLogic boards, gears, sensors and remotes fixed on site.
- New opener installationLiftMaster belt-drive openers installed and programmed.